INTRODUCTION
This article will discuss how to fix common network problems in Enterprise IT. It will be a useful guide to fixing network issues or connectivity issues for businesses and organizations. From the Server room to your Radio Tower and to your networking devices. It will focus on simple steps you can take to restore a broken link or improve poor performance. It will also give insight that will help you troubleshoot the network.
TWO CATEGORIES OF NETWORK PROBLEMS
Business failure can result from Network failure for both internal and external use. IT professionals are usually called to fix network issues that are either total network downtime or poor performance of the network. So from the perspective of the IT engineer, the troubleshooting is either for a Network Downtime or Performance Optimization.
Network Downtime
This is when there is zero signal or communication between the different Stations or between the Stations and the communication devices (routers and switches). When you initiate a ping to a remote device or station, you will get them as “unreachable” or “failed”. We use Pings to test connectivity between devices.
Network downtime means that there is a “break” in the links connecting the different stations and you will need to restore that first before you can enhance the performance of the network. They tend to sometimes be easier to diagnose as they can be the result of very simple things like power outages.
Network Optimization
Network Optimization simply means upgrading the network for better performance. In this case, the links between the different Stations are up and running but some difficulty may arise when you apply a payload. Network Optimization problems will return a positive response to a ping. The devices are reachable and can return a ping but have very limited capacity. A ping carrying a payload will result in a failure or the response time will be very poor leading to a resulting sub-optimal network performance. Optimization issues may sometimes be harder to diagnose.
STEPS TO TROUBLESHOOTING/FIXING COMMON NETWORK PROBLEMS
There are many things that could break a link, from hardware issues to software, from ports, improper settings or misconfiguration, cabling issues, power, etc. The following are steps to help diagnose the common Networking problems and how to fix them. The bulk of the work in Networking is troubleshooting or fixing networking problems. It is important to learn to do it in a logical way or in a simplified manner. The following outlines some for day-to-day use.
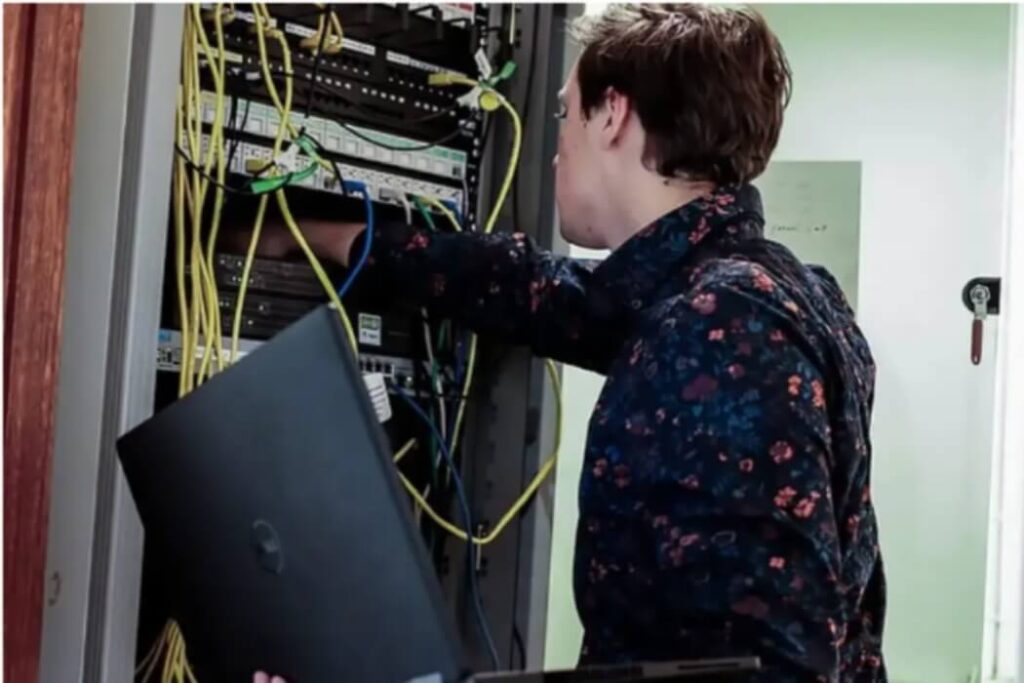
1 . Perform A Visual Inspection Of The Server And Connected Devices
One of the first things to do before doing any of the more technical troubleshooting is simply to check the devices and cable. See if all your devices (routers, switches) are powered on and blinking, and make sure no cable is unplugged or loosely plugged. Many network problems are simply a result of broken connections to power sources or bad cables. Sometimes an authorized person may have inadvertently unplugged a cable. Fixing a network downtime can simply mean powering up a device or plugging a cable.
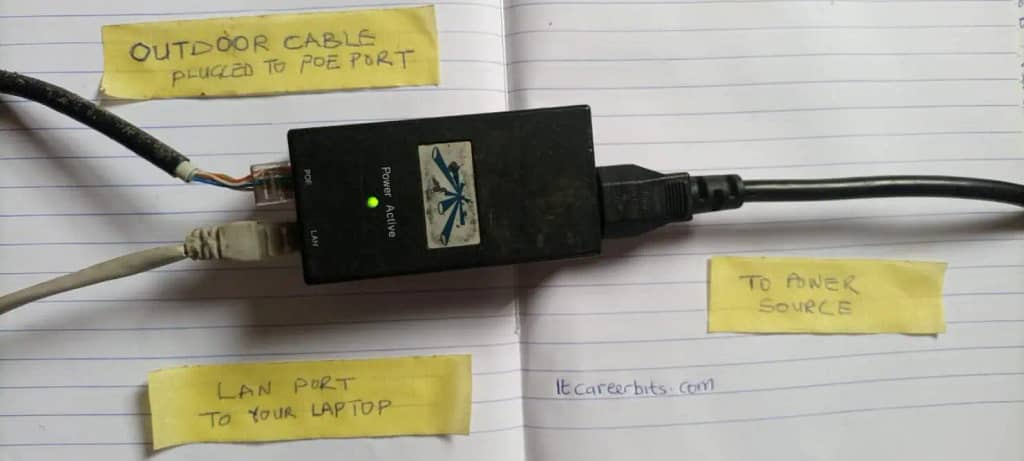
Trace all the cables, from the outdoor cables to the Power-Over-Ethernet (POE) Injector, If the POE is not connected (indicated by a blinking light), your Radio will not be powered. Also from the POE injector to the Power-surge protector, to the Switches and Routers. When you have ascertained that none of these basic things -i.e. loose cables, detached cables, all devices are all properly powered on and functional.
2. Check Your Cables
When troubleshooting a network, it is necessary to start from the lower levels of the OSI model. Layer 1 – Cables and wires. Make sure these are okay before moving up the OSI stack to test your Switches and Routers (layer 3). Confirm the LAN cables from the Routers and Switches are okay, and do a visual inspection to make sure no pins are broken. Then test the quality of the LAN cable using your network cable tester.
3. Test For Local Connectivity
Go to your POE device, unplug the LAN cable that is attached to the LAN port (the other end is attached to the Router or Switch), and connect this end (from the POE) to your laptop. Basically, what you are trying to do is to connect your laptop directly to the Radio Tower so that you can test connectivity.
To ping the local mast, you will need to know the IP address of the Radio, you can use an IP Scanner to achieve this (or from logs if they were previously documented). Normally you should get two sets of IP addresses, one will be for the local radio and the other will be for the remote site.
Now ping (continuous ping) the local site from the command prompt of your laptop (ensure that you disconnect your laptop from internet services). The command for the ping is below
ping “IP address” -t
For example;
ping 192.168.1.24 -t
ping 192.168.1.24 -t -l 65500
Also, issue another continuous ping command with a payload of 65500 (useful to test the performance) as indicated above.

The possible problem here would be that the IP of the remote site could not be reached or discovered. That would indicate a problem with the radio -either the outdoor cable is bad or it is not powered up or it is faulty.
Typically, pings from the local site will ideally return results at less than 1 ms as shown in the diagram above (left), it will be slower when you apply a load (65500 in the above diagram). Also, it is customary to arrange the ping for the local to be on your left while the Remote site should be on your right (as shown above)
If you can reach the local site with pings from your laptop, you have narrowed down the network issue to be with the remote site, in which case you proceed to step 3 below. You will have to troubleshoot the connectivity with the local site first before you can proceed with the remote site.
4. Test For Remote Connectivity
Check for connectivity with the Remote site by pinging its IP as above. The remote site must also return a response for your pings. Otherwise, it would indicate that the local site cannot reach the remote site. There can be a number of reasons why this may occur. Some of the more common ones to fix are in the subsections below.
ping 192.168.1.25 -t
ping 192.168.1.25 -t -l 65500
In the above instance, the remote IP address was 192.168.1.25.
5. Login To The Local And Remote Radio From Your Laptop
Log in to the local and remote Radios to the Server by using their IP addresses. Note that these are private IP addresses and are only for internal use within the organization. Most common Radio software like those of Ubiquiti, Mikrotik, UniFi, or other similar vendors will give some indication of the quality of Service such as the Air Capacity, Air Quality, Signal Strength, etc.
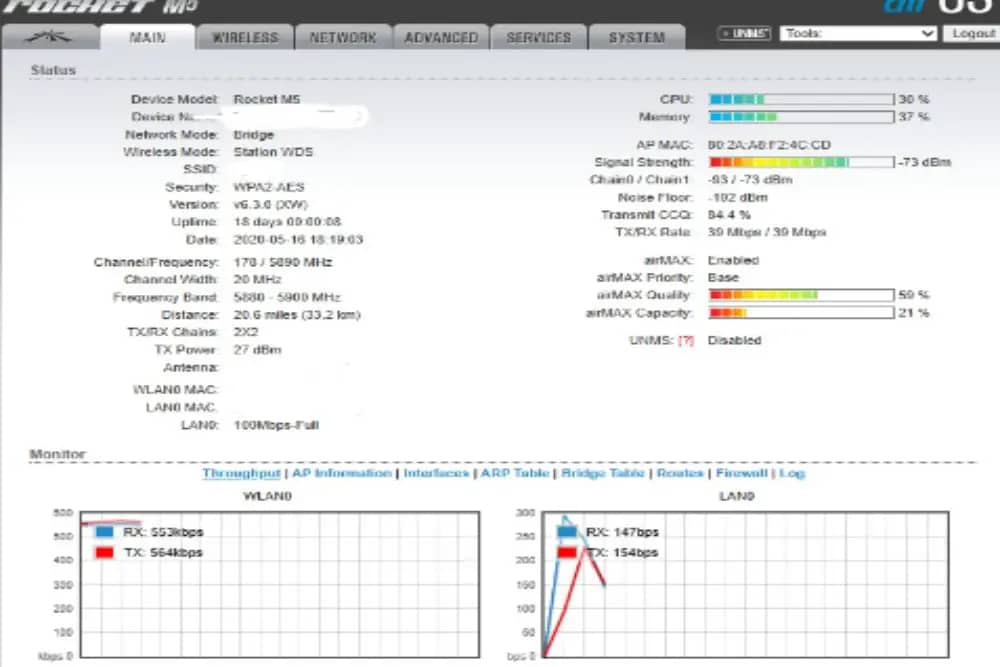
If the signal strength is very poor, chances are high that your local and remote radios are misaligned and may need some adjustment to improve the signal quality.
6. Check For Duplex And Speed Mis-Match
You will have poor network performance if there is a duplex and speed mismatch between the local and remote sites. For example, if the local site is set at half duplex and the remote is set at full duplex or speed of 10mbps at one end and 100 Mbps at the other side.
It is always a good idea to set the speed at both ends to Auto and the duplex to Full to avoid mismatch errors or collision errors which can greatly affect network performance
7. Check For Frequency Mis-Match
Another common reason for network downtime or poor performance of a network is frequency mismatch or congested frequency. Do an automatic frequency scan in the test mode of your radio or manually test selected frequencies to get one with a better performance. Fixing a network problem might just require you to move from a more congested channel or frequency to a less congested one.
It is important to note that when making a change on your Radios, you should make the changes on the remote site first before you do so for the local site. This is to ensure that you do not lose connectivity with the remote site while you are making any changes. If you do it the other way around
8. Refresh or Reboot The Device
Refreshing or Rebooting your device can sometimes help fix performance or network issues. Rebooting or Refreshing devices can take a couple of minutes. Ensure there is no critical infrastructure relying on the network before you do a refresh or reboot.
9. Re-connect Devices And Test Performance
It is important to test the network as a whole unit after fixing the downtime. Secure your wires, cables, and power outlets. No loose wires should be flying around or a shaky power outlet. This “clean up or tidying up” process is also to help prevent the network from breaking easily. Your network should be “tolerant”.
CONCLUSIONS
When troubleshooting network problems (downtime), start from the very simple steps. From layer 1 of the OSI model, check the cable connectivity, power sources, POE, etc before moving up the stack. Check for connectivity to the local station and then to the remote station. Test connectivity with pings (with or without loads), and check for mismatches in frequency channel, duplex, speed setting, etc. Make the troubleshooting process as systematic as possible. It is easier to narrow down your diagnoses to smaller units when you use a systematic approach. Start from the simpler things to the more complex things.
Read
LEVERAGING THE CLOUD: YOUR GUIDE TO THE BEST FREE CLOUD STORAGE